Sleep Systems / Choosing your sleeping pad
Conditions · Fit · Complete kit
Choose a pad for the night you are planning.
Work through insulation, sleeping space and what you will carry. Then compare the exact sizes that meet those needs.
To choose a sleeping pad, start with your trip conditions, check insulation, measure the sleeping space you need and try the pad in your usual sleeping position. Compare weight and price once those requirements are met. A low pack weight is less useful if your feet hang off the end or the pad leaves too little room for your partner.
This guide helps you build a shortlist for tent camping and backpacking. For a closer comparison of the three constructions, see foam vs inflatable and self-inflating sleeping pads.

1. Decide what the pad needs to do
Write down where you will camp, when you will go and how the pad gets there. A campsite beside the car and a walking trip can use similar sleeping equipment, but they give packed bulk and carried weight very different importance.
Car camping
Check the sleeping surface and tent space first. You can consider bulkier options when the car carries them, but check the rolled size against the rest of your luggage.
Backpacking
Set the insulation and fit requirements, then compare the complete carried kit. Include the inflation equipment and repair supplies you will actually take.
Sharing a tent
Measure both sleeping spaces together. A wider pad changes what fits beside it; the tent’s advertised person count does not settle the arrangement.
For your first few trips, borrowing or renting a suitable pad can help you identify the feel and width you prefer before committing to a purchase. Inspect its condition and check that the supplied pad matches the expected conditions. Use our car camping checklist to place it within the rest of your packing plan.
2. Check insulation separately from thickness
A sleeping pad provides cushioning and a barrier against heat loss to the ground. Its R-value measures resistance to heat flow; a higher value indicates greater insulation. Look for a published test basis, such as ASTM F3340, rather than treating the word “insulated” as a complete specification. Sea to Summit explains the rating and its testing. For the ranges, test-method checks and layering examples, read sleeping pad R-value explained.
As broad shopping categories, REI groups pads into warm-weather options below R-2, cool-weather options at R-2 to R-3.9, cold-weather options at R-4 to R-5.4, and extreme-cold options at R-5.5 and above. These categories help you narrow the search; they do not guarantee comfort on a particular night.
The air-temperature forecast does not describe every condition under your tent. Ground, moisture, your sleeping bag and your own tendency to sleep cold also matter. Sea to Summit explains why it does not assign a comfort temperature to its mats. For winter or unfamiliar cold conditions, check the intended setup with an experienced local outfitter before buying.
3. Match the pad to your body and your tent
Use the actual length, width and outline, rather than labels such as Regular or Large. REI describes common sizes around 72 inches (183 cm) long and 20 inches (51 cm) wide, with wider and longer choices available. Those figures are useful starting points, not standard dimensions shared by every brand.
| Measurement | What to check | A useful question |
|---|---|---|
| Length | Where your head, torso and feet rest with your usual pillow and sleeping bag. | Does the arrangement leave any part of the sleeping space shorter than you want? |
| Width | Where your elbows and knees land when you turn. | Can you change position without immediately reaching the edge? |
| Shape | The usable width at the shoulders, hips and feet, especially on tapered pads. | Are you comparing the full outline or just the widest point? |
| Tent fit | The floor plan, narrow end, door access and space used by another sleeper. | Can both pads lie flat in the positions you intend to use? |
Example: two pads that are each 25 inches (63.5 cm) wide occupy 50 inches (127 cm) side by side. A tent with a maximum floor width of 52 inches (132 cm) leaves only 2 inches (5 cm) in that simple calculation. A tapered floor or raised pad edges can change the fit. This is a measuring example, not a claim that the combination works. Compare your floor and pad dimensions in our tent layout checker.
Lay out the equipment together if you can. For a tall sleeper, check the pad length and tent length as separate decisions; extra pad length cannot create extra shelter space. For vehicle-based trips, use how to choose a camping tent to check the sleeping layout, wall clearance and access. If you will carry the shelter on foot, compare its complete packed kit separately.

4. Try cushioning in your normal sleeping position
Lie down with the pillow and sleeping bag you expect to use. Roll onto your side, onto your back and through the movements you normally make. Notice whether your shoulder or hip reaches the ground, whether the edges feel stable and whether you have enough room to move.
On an inflatable pad, adjust firmness using the manufacturer’s directions and compare the feel again. Assessing it only while sitting upright gives you a different view of support from lying down. Listen while you turn, too: fabric and internal materials can make noise that matters more in a quiet shared tent.
If you mainly sleep on your side, use our sleeping pads for side sleepers comparison after this fit check. Pair the shortlist with your camping pillow; a pillow that works on one sleeping surface may feel different on another.
5. Choose the construction that suits your routine
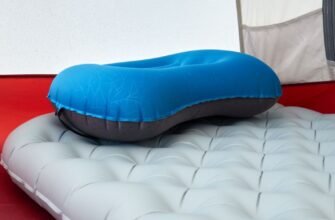
Closed-cell foam unfolds or unrolls without inflation, but retains its bulk when packed. Air pads can offer a small packed bundle with adjustable firmness; their chambers and valves need to hold pressure. Self-inflating pads combine a foam core with air, so check both their support feel and rolled dimensions. Therm-a-Rest’s sleeping pad guide describes these constructions and their features.
Imagine the routine you will repeat: unpacking, inflation, changing firmness, morning deflation and packing. If one operation looks awkward, try it before buying. Our construction comparison goes into those tradeoffs in more detail.

6. Compare the complete weight, packed size and cost
Keep every number attached to the exact configuration. A Regular pad’s weight beside a Wide pad’s dimensions is not a useful comparison. Record the size and generation, then check whether the listed weight includes the pump sack, storage bag or repair kit.
Illustrative calculation: a 16-ounce pad (454 g), a 2-ounce pump sack (57 g) and 1 ounce of storage and repair items (28 g) total 19 ounces (539 g). These are example quantities, not specifications for a product. Use the same inclusion rule for each candidate.
Measure the packed bundle against the space left in your bag. For a foam mat carried outside a backpack, check the attachment points and how the load moves. For car camping, compare the roll with the boot or trunk space needed by the rest of the group. Price the accessories you need alongside the pad, even when another listing includes them.
Your sleeping pad shortlist checklist
Save these six lines for each candidate. If a fit requirement fails, move to a different size before comparing a lower price or lighter weight.
- Trip: destination, season, expected overnight conditions and how far you will carry it.
- Insulation: published R-value, test basis and suitability for the planned sleep setup.
- Fit: exact dimensions and shape, with both sleepers’ pads checked against the tent.
- Feel: your normal sleeping position, turning room, edge support and noise.
- Complete kit: total carried weight, packed measurements and accessory cost.
- Ownership: inflation method, compatible repair supplies, storage space and current return terms.
Read the storage instructions before deciding where the pad will live between trips. For example, Sea to Summit recommends loose, open-valve storage for its air and self-inflating mats. Follow the directions for your own model.
Sleeping pad questions
Is a thicker sleeping pad always better?
Choose thickness by trying the sleeping surface, then check insulation separately. A pad can feel well cushioned yet have a lower R-value than a thinner alternative. Extra thickness also changes packed bulk and the height of the sleeping setup inside your tent.
Should I choose a wide sleeping pad?
Consider a wider size when your usual sleeping position or turning movement leaves too little room on a narrow pad. First check the actual dimensions inside your tent, including your partner’s space. A wider label alone does not confirm usable shoulder and foot room.
Can one pad work for car camping and backpacking?
It can, if the same size, insulation and packed kit meet both trips’ needs. Compare the compromise you will notice most: the carrying burden on a walking trip or the sleeping surface at camp. Write both trips into your shortlist instead of choosing by category name.
Do I need a new sleeping bag with a new pad?
Check the combination before buying another item. Make sure the bag has the room and temperature-rating information you need, and try it on the new pad. Our side-sleeper sleeping bag guide helps compare cut and movement space.
Choose your next step
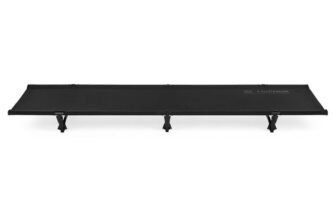
- Compare raised beds and floor-level setups in camping cot vs sleeping pad.
- Compare exact sizes and packed bundles in four camping mattresses for vehicle-access trips.
- Compare setup and packing tradeoffs in foam vs inflatable sleeping pads.
- Narrow the model options with sleeping pads for side sleepers.
- Place the sleeping kit within your complete car camping checklist.
How this guide was prepared: The decision checklist and numerical examples are editorial tools, supported by the linked retailer and manufacturer guidance. They are not results from our own equipment tests. Photos illustrate camping situations and do not identify or endorse a particular pad model. Sources checked November 18, 2026.